Home / Blog Posts / Pot Lights Installation: A Step-By-Step Guide
04 Feb, 2025
Posted by Colony Electrical Inc
0 comment
Pot Lights Installation: A Step-By-Step Guide
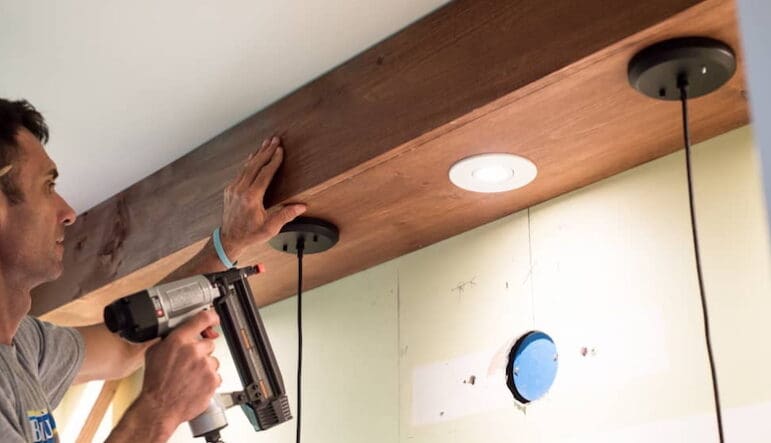
Pot lights, also known as recessed lighting, provide a sleek, modern lighting solution for homes and businesses. They brighten spaces without cluttering the ceiling, making rooms appear larger and more elegant.
While some homeowners attempt DIY installation, proper wiring and placement require expertise to ensure safety and efficiency. If you’re planning to install pot lights, this guide will help you understand the process—but remember, hiring a professional is always the safest option.
⚠ Disclaimer: Read Before Proceeding
This guide provides a high-level overview of pot light installation for informational purposes only. Pot light installation involves working with electrical wiring, which can be dangerous if not done correctly. Colony Electrical Inc. is not responsible or liable for any injuries, damages, or code violations resulting from DIY installation. Always consult a licensed electrician to ensure safety and compliance with local electrical codes.
If you’re looking for professional pot light installation in Burlington, Oakville, Mississauga, Etobicoke, or Hamilton, contact Colony Electrical Inc. for expert service.
Tools & Materials Needed
Before starting, gather the necessary tools and materials:
🛠Tools
✔ Stud finder
✔ Drywall saw
✔ Tape measure
✔ Wire stripper
✔ Voltage tester
✔ Screwdriver
✔ Drill
🔌 Materials:
✔ IC-rated or non-IC-rated pot lights
✔ Electrical wire (Romex 14/2 for most residential applications)
✔ Wire nuts and connectors
✔ Switch and dimmer (optional)
✔ Junction box (if required)
Step 1: Plan Your Pot Light Layout
Strategic placement ensures balanced lighting and prevents dark spots. Follow these spacing guidelines:
📏 Divide the ceiling height by 2 to determine pot light spacing. For example, in an 8-foot ceiling, lights should be spaced 4 feet apart.
✅ Living Rooms & Bedrooms: Install 4-6 feet apart for ambient lighting. ✅ Kitchens & Workspaces: Position above countertops and islands for task lighting. ✅ Commercial Spaces: Ensure even spacing for professional illumination.
💡 Pro Tip: Use a stud finder to locate ceiling joists before marking installation points.
Step 2: Turn Off Power & Mark Installation Points
Safety first! Switch off the power at the circuit breaker before handling any wiring.
✔ Use a pencil to mark the spots where each pot light will be installed. ✔ Check for obstructions, such as joists, HVAC ducts, or plumbing. ✔ Use a drywall saw to cut precise holes for the fixtures.
Step 3: Run Electrical Wiring
If replacing an existing light fixture, you can connect pot lights to the existing circuit. For new installations:
1️⃣ Run 14/2 electrical wire from the switch to the first pot light location. 2️⃣ Continue wiring between each pot light in a daisy-chain connection. 3️⃣ Strip the wire insulation and connect black to black, white to white, and ground to ground using wire nuts.
💡 Pro Tip: If installing multiple pot lights, use a junction box for better organization and safety.
Step 4: Install Pot Light Housings
Depending on the type of ceiling, choose the right housing:
✔ IC-Rated Housings – Safe for insulated ceilings, preventing overheating. ✔ Non-IC Rated Housings – Suitable for non-insulated ceilings.
🔩 Secure the housing brackets inside the ceiling hole. Most modern pot lights have spring clips that snap into place.
Step 5: Connect & Secure the Pot Lights
Once the housings are installed:
✔ Attach the wires from the fixture to the house wiring (black to black, white to white, ground to ground). ✔ Carefully tuck the wires inside the housing. ✔ Snap or screw the pot light trim into place.
💡 Pro Tip: Use dimmable LED pot lights for better energy efficiency and mood control.
Step 6: Restore Power & Test the Lights
⚡ Turn the circuit breaker back on and test each light.
✔ Ensure all pot lights turn on and function correctly.
✔ Check for flickering, overheating, or dimming issues.
If any problems arise, verify wiring connections or consult a professional electrician.
Why Hire a Professional Electrician for Pot Light Installation?
While DIY installation may seem cost-effective, professional electricians ensure safety, compliance, and flawless results.
✅ Avoid wiring mistakes that cause flickering, overheating, or circuit overloads. ✅ Ensure installation meets Ontario Electrical Safety Code standards. ✅ Save time with expert placement and wiring for balanced illumination.
Trust Colony Electrical Inc. for Pot Light Installation
Pot light installation involves working with electrical wiring, which can be dangerous if not done correctly. For safety, compliance, and peace of mind, always hire a professional electrician.
Colony Electrical Inc. specializes in pot light installation in Burlington, Oakville, Mississauga, Etobicoke, and Hamilton. Whether upgrading your home or business, we provide safe, expert service with high-quality, energy-efficient LED pot lights.
Why Choose Colony Electrical Inc.?
✔ Licensed electricians with years of experience ✔ Safe, code-compliant installation ✔ High-quality, energy-efficient LED pot lights
✨ Brighten your space with professionally installed pot lights! ✨